I. Introduction
If you’re planning a DIY project that involves painting treated wood, there are some important factors to consider. Treated wood is a common choice for outdoor furniture, decks, and structures because it is resistant to rot and decay. However, painting treated wood requires specific guidelines to ensure its longevity, prevent environmental hazards, and ensure that the final result is what you’re expecting. So, whether you’re an expert or a beginner in painting, our comprehensive guide will help demystify all things related to painting treated wood.
II. The Dos and Don’ts of Painting Treated Wood: A Comprehensive Guide
Before diving into painting, be sure to read the manufacturer’s instructions for the wood carefully. These should provide specific guidelines for things such as drying times, recommended use, and painting techniques that should be followed. Here are some general guidelines when working with treated wood:
- DO wear appropriate gear: This includes gloves and a mask to protect your hands and respiratory system from wood particles, bacteria, and chemicals.
- DO store leftover materials properly: Dispose of excessive materials at designated drop-off facilities and store remaining chemicals in a cool, well-ventilated place.
- DON’T assume all wood is the same: Be sure to understand the difference between untreated wood, painted wood, and pressure-treated wood, as they may require vastly different painting techniques.
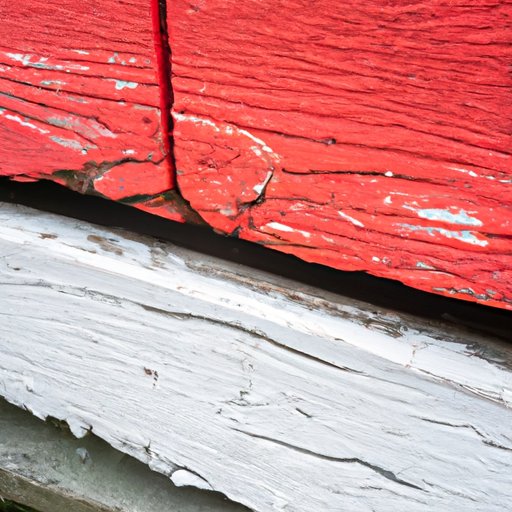
III. Can You Paint Pressure-Treated Wood? The Answer Might Surprise You
Pressure-treated wood is the most common type of treated wood that is used in many construction projects. The wood undergoes a treatment process using chemicals that aim to prevent rot and wood-damaging insects. Given this, painting treated wood can be a bit tricky, as pressure-treating changes the wood’s structural composition, making it more resistant to water and moisture. On the downside, the chemicals used in treating the wood can interfere with the paint’s adhesion, giving a less-than-perfect result. Here’s what you should consider when painting pressure-treated wood:
- Light chemical reaction: The chemicals used in treating pressure-treated wood can react with certain types of paint, resulting in the paint bubbling, peeling or flaking off.
- Allow for drying time: Because pressure-treated wood holds more moisture, it tends to take longer to dry. For best results, wait at least six months after pressure treatment to paint your project.
- Choose the right paint: Opt for Coatings with high elasticity and adhesion, or stain the wood to maintain its natural color while offering protection.
IV. Exploring the Best Paints and Techniques for Refinishing Treated Wood
Paints come in different finishes, textures, and consistencies. When it comes to treating and refinishing treated wood, there are specific options you can choose from to achieve your desired result. Techniques that may help include brushing, rolling, and spraying. Here’s what you need to know to refinish treated wood:
- Types of finishes available: Choose from paint, stain, and clear sealer. Paint adds color and coverage while stain preserves the wood’s natural look. Clear sealers prevent damage from water and moisture.
- Choosing the right type of paint: Lime-resistant, acrylic-based paint is ideal for treating rough or splintered wood surfaces. If you’re trying to conceal the surface defects, conventional paints can help.
- Painting techniques: Use a high-quality paintbrush or a roller if using paint. Likewise, spraying paint with an air compressor can provide a smoother finish.
V. The Environmental Impacts of Painting Treated Wood: What You Need to Know
The environment is an important consideration when painting treated wood. Improperly disposing of paint and chemicals can lead to environmental hazards. Additionally, the chemicals used in treating the wood can be harmful to the environment if not disposed of properly. Here are some tips for minimizing the environmental impact of your project:
- Dispose of paint and materials properly: Never pour leftover materials down a drain, into a septic system, or on the ground, as these will contaminate water sources.
- Use eco-friendly materials: Look for low VOC, or volatile organic compounds, paints and stains to minimize environmental impact.
- Support reforestation efforts: Commit to purchasing only wood that is certified by The Forest Stewardship Council (FSC), an organization that promotes sustainable forest management.
VI. How to Prep and Prime Treated Wood for Long-Lasting Paint Results
Preparation and priming are essential steps when painting treated wood for best results. Here are some tips for prepping and priming your treated wood:
- Mistakes to avoid: Common mistakes include neglecting to sand the wood, using old or inferior brushes, not blending paints, painting under the sun, and not cleaning the surface before painting.
- Proper prep and priming: Wash the surface with a stiff-bristle brush, then rinse thoroughly and allow to dry completely. Use an oil-based primer that resists tannin stains that may penetrate the paint, or opt for a specialty bonding primer that will hold paint to the wood’s fibers.
- Add final touches: After the primer dries, inspect the surface for any rough spots or defects, then sand to achieve a smooth surface.
VII. Top Mistakes to Avoid When Painting Treated Wood: Tips from the Pros
Painting treated wood requires attention to detail. Mistakes can happen, but knowing the common ones painters encounter can save yourself from a frustrating experience. Here are some tips from professional painters on how to avoid the most common mistakes:
- Thin your paint: Too-thick paint can trap air bubbles and lead to a bubbling or peeling paint.
- Don’t rush: Patience is key to a successful painting project. Take your time, follow instructions, and allow the paint to dry completely.
- Acclimate your wood: Properly acclimate your wood in an arc-welded steel rack for weeks before painting to make it free from moisture.
VIII. The Benefits and Drawbacks of Painting Treated Wood: Is it Right for You?
Painting treated wood offers several benefits. It protects the wood from sun, wind, rain, and other environmental elements, enhancing its longevity. Despite this, there are some drawbacks that might make you reconsider those benefits, including added cost and environmental impact. Here are some tips on how to determine whether painting treated wood is the right choice for your project:
- Advantages of painting treated wood: Increased durability, improved aesthetics, protection from harsh environmental elements, and ease of maintenance and cleaning.
- Disadvantages of painting treated wood: The chemicals in the treatment may leach into the soil if not disposed of properly, extra expenses may be incurred, and you might lose the natural texture and look of the wood depending on the finish you choose.
IX. Conclusion
Painting treated wood can be an excellent way to protect and preserve it for years to come, but careful consideration should be taken to ensure that the outcome is what you desire. By following the guidelines discussed in this article, you should be well-equipped to tackle your next project with aplomb. Always remember, preparation, patience, and following instructions are key to a successful project. Have fun and share your experiences in the comments below or reach out to the author.


