I. Introduction
If you’ve ever taken a physics class, you’ve likely encountered the concept of free body diagrams. These diagrams are a crucial component of solving problems in mechanics, but they can be difficult to master.
In this article, we’ll explain what free body diagrams are, why they’re important, and give you a comprehensive guide to drawing them. Whether you’re a beginner or an experienced physics student, this guide will help you sharpen your skills and tackle physics problems with confidence.
II. Mastering the Basics: A Beginner’s Guide to Drawing Free Body Diagrams
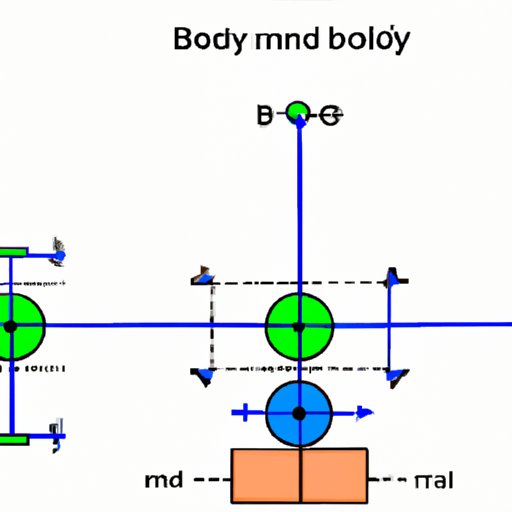
A free body diagram is a visual representation of the forces acting on an object. It’s a simple sketch that shows all the forces acting on the object as arrows pointing in the direction of the force. The size of the arrow represents the magnitude of the force.
Free body diagrams are essential because they help you understand how an object moves and how external forces affect that movement. They’re used to solve problems in statics, dynamics, and other areas of mechanics.
Before you can start drawing free body diagrams, you need to understand the different types of forces and how to identify them. The most common types of forces you’ll encounter are:
- Gravity
- Friction
- Tension
- Normal force
- Applied force
- Spring force
Once you know what forces to look for, you can start drawing your free body diagram. The basic steps are:
- Identify the object you want to draw the diagram for
- Draw a dot or box to represent the object
- Identify all the forces acting on the object
- Draw an arrow for each force, pointing in the direction of the force
- Label each arrow with the name of the force and the magnitude
III. From Forces to Figures: Tips and Tricks for Drawing Accurate Free Body Diagrams
While the basic steps for drawing a free body diagram are straightforward, there are some common mistakes you’ll want to avoid.
One mistake is drawing the arrows in the wrong direction. It’s important to always draw the arrows in the direction that the force is acting on the object. If the force is pulling to the right, the arrow should point to the right.
Another mistake is failing to account for all the forces acting on the object. Make sure you think through all the forces that could be at play, even if they’re not obvious. For example, if an object is on an incline, there will be a force due to gravity acting parallel to the surface of the incline.
When multiple forces are acting on the same object, it can be challenging to know how to draw the diagram. One helpful approach is to draw each force acting on the object separately and then combine them into a single diagram. Start with the most significant force and work your way down to the least significant.
Finally, it’s important to represent the magnitude of each force accurately. The length of the arrow should be proportional to the magnitude of the force. If one arrow is much longer than another, it indicates that the longer arrow represents a force with a greater magnitude.
IV. Mechanical Physics Made Simple: The Art of Drawing Free Body Diagrams
A significant advantage of free body diagrams is that they simplify complex situations into a clear, visual representation. This simplification enables you to solve equations and understand motion and equilibrium with ease.
Suppose you have a block sitting on an inclined plane. You want to know how much force is required to keep the block in place. By drawing a free body diagram, you can identify all the forces acting on the block and use that information to solve the equation for force. Without the free body diagram, the problem may have been much harder to solve, or the solution may have been inaccurate.
Free body diagrams are also useful for understanding motion and equilibrium. In physics, equilibrium refers to the state of an object when all the forces acting on it balance out. When you draw a free body diagram, you can easily see which forces are acting in opposite directions and how they balance out. This information can help you predict how an object will move or how much force is required to keep it in place.
V. Visualization Techniques for Drawing Clear and Precise Free Body Diagrams
One of the challenges of drawing free body diagrams is visualizing the forces acting on an object. When the forces aren’t easily visible, you may need to use some creativity to draw an accurate diagram.
One technique is to visualize the object rotating around a specific point. This visualization can help you identify forces that wouldn’t have been obvious otherwise.
Another technique involves drawing vector diagrams. Vectors are graphical representations of forces that show the magnitude and direction of a force using an arrow. By drawing vector diagrams, you can easily see how multiple forces are acting on an object and how they’re affecting each other.
When drawing your free body diagram, it’s also essential to label and organize everything clearly and neatly. Label each force precisely, and make sure it’s clear which object the forces are acting on.
VI. Step-by-Step Instructions for Drawing Free Body Diagrams With Ease
To help you put everything you’ve learned into practice, we’ve created a step-by-step guide for drawing a free body diagram.
- Identify the object you want to draw the diagram for.
- Draw a dot or box to represent the object.
- Identify all the forces acting on the object.
- Draw an arrow for each force, pointing in the direction of the force.
- Label each arrow with the name of the force and the magnitude.
- Make sure each force arrow is proportional to the magnitude of the force.
- Organize and label everything clearly and neatly.
Let’s take a practical example to apply these steps. Suppose you want to draw a free body diagram for a ball hanging from a string. The weight of the ball causes tension in the string, which helps keep the ball suspended.
First, identify the object and draw a dot or box to represent the ball. Next, identify all the forces acting on the ball: the force of gravity pulling the ball down and the tension in the string pulling the ball up. Draw an arrow for each force pointing in the appropriate direction, label each arrow with the name of the force and the magnitude and ensure that each arrow is proportional to the magnitude. Take care to organize and label everything clearly and neatly.
VII. The Importance of Free Body Diagrams in Physics and How to Draw Them Correctly
To summarize the main points covered in this article, free body diagrams are visual representations of the forces acting on an object. They’re essential for solving problems in mechanics and simplifying complex situations into a clear, visual representation. Knowing how to draw them accurately is crucial to success in physics.
It’s essential to avoid common mistakes like drawing arrows in the wrong direction, failing to account for all the forces, or misrepresenting the magnitude of the force. Visualizing the forces and objects in 3D and using vector diagrams can also help you draw accurate free body diagrams. Remember to label and organize everything clearly and neatly.
Finally, practice is essential to become proficient in drawing free body diagrams. Start with simple examples and work your way up to more complex problems. With practice, you’ll improve your skills and be better equipped to tackle physics problems with confidence.
VIII. A Visual Guide to Drawing Free Body Diagrams: Simplifying Complex Physics Problems
To help reinforce the concepts discussed in this article, we’ve provided a visual guide to drawing free body diagrams. The guide includes examples of complex physics problems simplified through free body diagrams, key concepts, and visual aids to help you understand the topic fully.
IX. Conclusion
Free body diagrams can be challenging to grasp initially, but they’re an essential tool for solving physics problems. By mastering the basics, using visualization techniques, and following our step-by-step guide, you’ll be able to draw accurate, clear free body diagrams with ease. Remember, practice regularly, and you’ll undoubtedly improve your skills and achieve better results in physics.


