Introduction
Grouting floor tiles is a crucial part of any tiling project. Not only does it give a polished finish, but it also helps to protect your tiles from moisture and dirt. However, it can also be a bit of a challenge, thanks to common problems such as uneven grout lines, stained tiles, and cracking grout. In this guide, we’ll explore how to grout floor tiles flawlessly, without encountering these frequent issues.
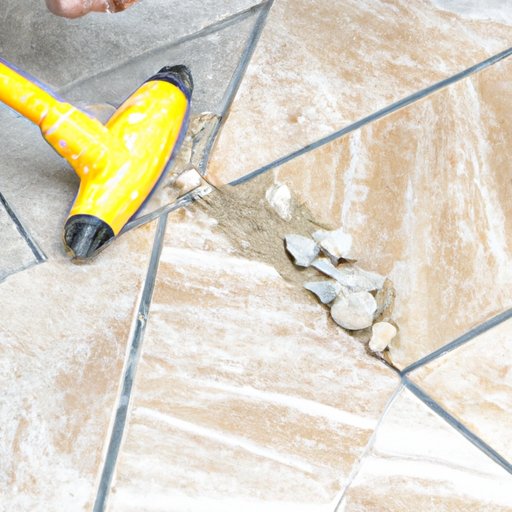
Step-by-Step Guide to Perfectly Grouted Floor Tiles
Before you start grouting your floor tiles, you’ll need to make sure that the tiles are properly set and clean. Let them set for at least 24 hours after installation to avoid any shifting or movement. Then, thoroughly clean the tiles by sweeping, vacuuming, and mopping them with a mild detergent. Here’s the step-by-step process for grouting:
Step 1: Prepare the Grout
You can choose between sanded or unsanded grout, depending on the size of your grout lines. Sanded grout is suitable for tiles with grout lines that are more significant than 1/8 inches in width, while unsanded grout is suitable for smaller grout lines. Mix the grout according to the manufacturer’s instructions, using a trowel and water. Let the mixture sit for five to ten minutes, then mix again before applying.
Step 2: Apply the Grout
Start by pouring the grout onto the tiles, spreading it out with a rubber float or squeegee in a diagonal direction. This will help to push the grout into the grout lines. Scrape off any excess grout to avoid staining and to get a cleaner finish.
Step 3: Let the Grout Dry
After applying the grout, let it dry for about 15 minutes. During this time, use a damp sponge to clean off any grout residue from the tile surface. This is also the time to take care of any ‘mistouches’ or slight unevenness in the grout lines.
Step 4: Buff the Tiles
When the grout is dry to the touch, start buffing the tiles with a dry cloth to remove any remaining grout haze on the tile surface. Make sure to buff gently, as excessive pressure can damage the newly applied grout.
Step 5: Seal the Grout
After the grout has dried overnight, apply a sealer to the grout lines to keep them looking like new. The sealer will help to repel water, dirt, and other stains that can discolor the grout. Follow the manufacturer’s instructions for drying time and application.
Common Mistakes to Avoid When Grouting Floor Tiles
Grouting floor tiles can be a tricky process that often leads to common mistakes. Here are some issues you can avoid:
Mistake 1: Not Mixing the Grout Properly
Follow the manufacturer’s instructions when mixing the grout. If you don’t mix the grout correctly, it’ll be too thick or too thin, and this will easily give an uneven finish.
Mistake 2: Applying Too Much Grout
If you apply too much grout to the tiles, it’ll be difficult to remove the excess and leave a blemish-free surface.
Mistake 3: Not Cleaning the Tiles Properly Before Grouting
When you don’t clean the tiles correctly, grout particles can stick on the tiles and cause dullness, staining or lead to mold formation.
Mistake 4: Not Using the Right Tools
Use the right tools to ensure a smooth application, such as a rubber float, a tile saw, and a trowel, among others.
DIY vs. Professional Grouting: Which One is Right for You?
Your decision to either grout your floor tiles personally or hire a professional will depend on your experience, budget, and the complexities required of the task. While you can save some money by grouting the tiles yourself, professional grouting comes with numerous advantages.
DIY Grouting
If you’re a handy person with some form of experience in tile installation and grouting, you can grout your tiles yourself. DIY grouting requires a lot of time and patience, so it’s crucial to set aside enough time to complete the task comfortably.
Professional Grouting
If you do not have the experience to properly execute a proper tile installation and grouting, hiring a professional tile installer will be the best option. Professionals have the necessary experience and tools to handle any unforeseen issues and ensure that your tiles look magnificent.
Secrets of the Pros: Insider Tips for Impressive Grout Lines
Impressive grout lines are a hallmark of a well-done tile installation. Here are some secrets and tips used by professional tile setters:
Tip 1: Use Colorful Grout
If you want to make your tiles stand out, try using colorful grout instead of ultra-white grout. The colors can match or contrast with your tiles, making them more noticeable and beautiful.
Tip 2: Slightly Overfill the Joints
Overfilling the joints by about 20% will enable them to shrink to size after drying up, leaving a tight, even finish.
Tip 3: Use Smaller Grouting Tools
Smaller grouting instruments give more excellent control over the grout application. They guarantee that you fill every nook and cranny, leaving no spots or unsupervised areas.
Hacks for Easy and Fast Grouting of Floor Tiles
Grouting floor tiles does not have to be a tough job. Here are some hacks to make it more manageable:
Hack 1: Tape the Joints
Before grouting, tape off the corners and joints to stop the grout from spreading off the grout lines. This will make cleaning up more relaxed and prevent stains.
Hack 2: Use Ready-mixed Grout
If you’re not too confident in your grouting skills, try using ready-mixed grout. It saves you the hassle of mixing and also saves time.
Hack 3: Reuse Recyclables
Reusing recyclables, like a plastic bottle, for grout application can help you reach areas that are harder to get to, such as corners or tight spaces. It also costs less and is an eco-friendly option.
Conclusion
Grouting floor tiles might seem like a complicated and daunting task, but with the right tools and knowledge, it can be reasonably stress-free and easy. By avoiding common mistakes, considering professional versus DIY grouting, and applying insider tips and hacks, you’ll soon be able to accomplish a polished and professional-looking tile installation from the comfort of your own home.


