Introduction
Hemming a dress is one of the essential skills that every home sewer should know. It is the finishing touch that can take a piece of fabric from a frumpy look to a polished and professional look. Hemming is not just about making a dress shorter; it is also about creating a clean edge that will not fray over time, and making sure that the fabric drapes elegantly over the body. In this article, we will explore various hemming techniques, from the beginner’s guide to the sewing expert’s advanced techniques. By the end of this article, you will be equipped with the knowledge to transform your dresses into fabulous outfits.
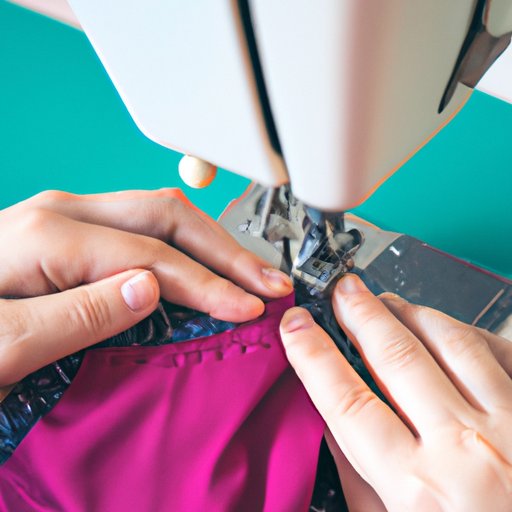
The Beginner’s Guide to Hemming a Dress: Step-by-Step Instructions and Tips
Before we start, let’s gather the tools and materials that we will need:
- A measuring tape
- A fabric marker
- A pair of scissors
- A sewing machine with a matching thread
- An iron and an ironing board
Now that we have our tools, let’s prepare the dress for hemming:
- Try the dress on and decide on the desired length. If you are not sure, a good rule of thumb is to have the hemline hit just above the knee.
- Remove any existing hemline by carefully cutting it off with a pair of scissors or a seam ripper. Be careful not to damage the fabric.
- Iron the dress to remove any wrinkles and creases.
Next, let’s measure and mark the hemline:
- Put the dress on a flat and even surface, such as a table or ironing board.
- Use a measuring tape to measure the desired hemline from the bottom of the dress and mark it with a fabric marker. Make the marks as even as possible to ensure a straight hemline.
- Add an additional ½ inch to the hemline for the folded hem.
Now, it’s time to cut the excess fabric:
- Carefully cut along the marked line with a pair of scissors, making sure to follow the line as accurately as possible.
- Trim the fabric if necessary and make sure the hemline is straight.
Let’s move on to sewing the hem:
- Fold the fabric up to the hemline mark, pressing it down with an iron, and pin it in place.
- Sew the hemline, removing the pins as you go along. You can use a straight stitch, a blind hem stitch, or a zigzag stitch, depending on the fabric thickness and your personal preference.
- Once you’ve sewn the hem, press it down with an iron again to create a nice, clean edge.
Lastly, let’s finish off the hem:
- Trim any loose threads.
- If the dress material is prone to fraying, you can use a serger or a zigzag stitch on the raw edge to prevent it from unraveling.
- Iron the dress again, and you’re done!
Some common mistakes beginners make when hemming a dress include not measuring accurately, not using enough pins, or not pressing the hemline before sewing. Remember that practice makes perfect, so keep practicing, and you’ll improve over time!
How to Hem a Dress in 10 Minutes or Less: A Quick and Easy Tutorial
If you’re short on time or need to hem several dresses quickly, here are some quick and easy techniques that you can try:
Tools and materials needed:
- A pair of scissors
- A sewing machine with a matching thread
- An iron and an ironing board
- Fusible hemming tape
Choosing the right hemming method for time efficiency:
If you’re hemming a dress made of lightweight fabric such as chiffon or silk, a fusible hemming tape is your best bet. It is a quick and easy alternative to sewing a hemline.
Quick preparation techniques:
- Cut the hemline to the desired length.
- Using fusible hemming tape, attach it to the wrong side of the fabric along the hemline.
- Turn the dress inside out and iron the hemline for a few seconds.
Quick hemming techniques:
- Remove the backing from the fusible hemming tape.
- Fold the hemline up to the hemline mark and press it down with an iron until it sticks to the hemming tape.
- Press the hem again with an iron to make sure it adheres to the fabric.
Finishing touches:
- Trim any loose threads.
- Iron the dress one last time, and you’re done!
The most common mistake people make when using fusible hemming tape is not ironing it long enough or not applying enough pressure when you iron it. Make sure to follow the instructions carefully to avoid any mishaps.
Achieve the Perfect Hemline: Expert Tips and Tricks for Hemming a Dress
If you’re looking for ways to achieve a perfect hemline, here are some tips and tricks to try:
Tips for measuring and marking accurately:
- Use a dress form or mannequin to ensure accuracy. This is especially useful for dresses with complex details, such as pleats or gathers.
- Use a ruler or a clear plastic hemming guide to help you draw straight hemlines without guesswork.
Choosing the right hemming method for the dress fabric:
- For sheer fabrics, use a rolled hem.
- For fabrics with a nap, such as velvet or corduroy, use a bias tape or a binding to finish the hemline.
Tricks for achieving a straight and even hemline:
- Use a hemming gauge to ensure the hem is the same length all around the dress.
- Use tailor’s chalk to draw a guiding line for your hem.
- Iron the hemline before sewing to prevent any unevenness or puckering.
Finishing techniques that enhance the overall appearance:
- Use a slipstitch or a blind hem stitch for a nearly invisible hemline.
- Add special embellishments, such as lace or embroidery, to the hemline to add detail and interest.
Sewing 101: Hemming a Dress like a Pro
If you’re an experienced sewer, here are some advanced hemming techniques to add to your arsenal:
Overview of advanced hemming techniques:
- Bound hem: A hemmed edge finished with a bias tape or a binding.
- Lace hem: A hemline embellished with lace or similar trim.
- Faced hem: A hemline where the edge is enclosed by a facing sewn to it.
Detailed explanation of each technique:
- Bound hem:
- Cut a strip of bias tape or binding to the length of the hemline.
- Pin the bias tape or binding to the right side of the fabric, aligning the raw edges together, and sew them together.
- Press the bias tape or binding away from the fabric and fold it over to the wrong side of the fabric.
- Pin the bias tape or binding to the wrong side of the fabric, enclosing the hemline.
- Stitch the bias tape or binding to the fabric, removing the pins as you go along.
- Lace hem:
- Cut a strip of lace to the length of the hemline.
- Pin the lace to the right side of the fabric, aligning the raw edges together, and sew them together.
- Trim any excess fabric or lace, and turn the hemline to the wrong side of the fabric.
- Pin the lace to the wrong side of the fabric, securing the hemline in place, and stitch it to the fabric using a slipstitch or a blind hem stitch.
- Faced hem:
- Cut a facing pattern from the same fabric as the dress.
- Stitch the facing to the right side of the fabric along the hemline.
- Trim any excess fabric or facing, and turn the hemline to the wrong side of the fabric.
- Pin the facing to the wrong side of the fabric, enclosing the hemline, and stitch it to the fabric.
When to use each technique:
- Bound hem: best for lightweight fabrics such as chiffon or silk.
- Lace hem: best for adding a unique detail to a plain dress.
- Faced hem: best for fabrics with a nap such as velvet or corduroy.
Troubleshooting advanced hemming techniques:
- Make sure to choose a hemming technique that is suitable for the fabric type and dress style.
- Practice on a scrap piece of fabric before starting on your actual dress.
- Take your time and be patient. Advanced hemming techniques can be challenging at first, but they will become easier with practice.
From Frumpy to Fabulous: Transform Your Dress with an Easy Hemming Technique
Hemming a dress is not just about creating a polished look; it’s also a way to customize your dress to your liking. Here are some fun and easy ways to transform your dresses:
How hemming a dress can transform its appearance:
- Making a dress shorter can make it look more youthful and fun.
- Adding a high-low hemline can add an interesting and modern twist to a classic dress.
- Cutting a dress into a midi or maxi length can make it look more formal and elegant.
Simple ways to customize your hemline:
- Adding lace or other trims to the hemline can add texture and detail.
- Using contrasting thread color or decorative stitches can add interest and personality to your dress.
- Experimenting with different hemming techniques, such as a bias binding or a rolled hem, can give your dress a unique and unexpected look.
Tips for choosing the perfect hemline for your dress style:
- Consider the occasion and dress code. Some hemlines are more appropriate for formal events, while others are better suited for casual outings.
- Take into account your body shape and height when deciding on the hemline. Certain hemlines flatter different body types better than others.
- Play around with different lengths and hemline styles to see what works best for you and your dress.
Examples of before and after photos can inspire you and give you ideas on how to transform your dresses.
Conclusion
In conclusion, hemming a dress is a crucial skill that every home sewer should know. From the beginner’s guide to the sewing expert’s advanced techniques, there is a hemming method suitable for everyone. Taking the time to hem a dress properly can transform a frumpy dress into a fabulous outfit that you’ll love wearing.


