I. Introduction
Shower pans are an essential component of any bathroom. They serve as the base for your shower, ensuring water is directed to the drain rather than pooling on your bathroom floor. However, installing a shower pan can be a daunting task for even the most seasoned DIYers. In this article, we’ll provide you with a step-by-step guide, video tutorial, and tips for comparing different types of shower pans, as well as a comparison of DIY vs professional installation methods and solutions to common problems.
II. Step-by-Step Guide
The process of installing a shower pan can be broken down into six steps. By following these steps, you can ensure that your shower pan is installed correctly:
Preparing the Bathroom
The first step is to prepare the bathroom. This involves removing any existing flooring and preparing a subfloor. You may also need to remove or adjust plumbing fixtures if necessary.
Measuring the Area
Next, you’ll need to measure the area where you’ll be installing the shower pan. This will involve measuring the length and width of the space, as well as ensuring the floor is level.
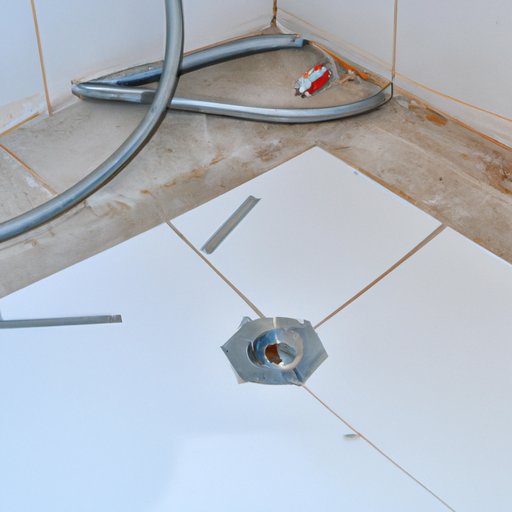
Installing the Drain
The drain is a critical component of your shower pan. You’ll need to ensure that it’s installed correctly and that it’s level with the floor. This step typically involves installing the drain base, flange, and tightening the screws.
Inserting the Pan
Once the drain is installed, you can start inserting the shower pan. You’ll need to ensure that the pan fits into the space correctly and that it’s level. You may also need to cut the pan to size and make adjustments as necessary.
Finishing the System
The final step is to finish the system by installing the shower enclosure and sealing any gaps or joints. This step also involves testing the shower pan to ensure it’s working correctly.
Each of these steps is vital to ensure the proper installation of your shower pan. To make the process more manageable, it’s best to break it down into smaller steps. Additionally, you can consult our helpful pictures and diagrams for each step.
III. Video Tutorial
For those who are more visual learners, a video tutorial is an excellent option for providing step-by-step instructions on how to install a shower pan. When creating a video, make sure you explain the process clearly and thoroughly. You may also want to include tips on how to avoid common mistakes.
IV. Comparison of Different Types of Shower Pans
There are different types of shower pans available on the market, including acrylic, fiberglass, concrete, and tile. When choosing a shower pan, it’s important to consider the pros and cons of each type. For example:
- Acrylic shower pans are lightweight, low maintenance, and relatively inexpensive. However, they may scratch easily and may not be as durable as other materials.
- Fiberglass shower pans are also lightweight and cost-effective but may not be as durable as other materials. They can also be difficult to repair once damaged.
- Concrete shower pans are heavy-duty, long-lasting, and can be customized to fit your unique shower space. However, they may be more expensive and difficult to install than other options.
- Tile shower pans are elegant and available in various shapes and sizes. They are also durable and low maintenance. However, they may be more expensive and difficult to install.
When choosing a shower pan, it’s also important to consider the size and shape of your shower space and ensure that the pan matches the style of your bathroom.
V. DIY vs. Professional Installation
One of the major decisions you’ll need to make when installing a shower pan is whether to do it yourself or hire a professional. Both options have benefits and drawbacks.
DIY installation can save you money and allow you to customize the shower to your preferences. It can also give you a sense of accomplishment. However, it can be time-consuming and may require specialized tools and skills. Additionally, if not done correctly, it can lead to costly mistakes.
Professional installation may be more expensive, but it ensures that the job is done correctly and to a high standard. It can also save you time and stress.
When determining whether to install your shower pan yourself or hire a professional, consider the complexity of the installation, your experience and skills, and the time and effort you’re willing to put in. Make sure to research and compare costs of service providers or find useful DIY tips.
VI. Common Problems and Solutions
Installing a shower pan can come with its own set of problems. Fortunately, most issues that arise can be addressed with some troubleshooting. Here are some common issues and solutions to consider:
- Leaking shower pan: If the shower pan is leaking, make sure the drain is installed correctly and that it’s sealed around the edges. You may also want to test the shower pan to ensure there are no leaks.
- Uneven shower pan: If the shower pan is uneven, you may need to adjust the leveling legs or drainage slopes.
- Cracked shower pan: If the shower pan is cracked, you may need to replace it. This is a good opportunity to consider upgrading to a higher-quality material.
If you’re unable to resolve a problem, consider consulting a professional or looking for helpful resources online.
VII. Conclusion
Installing a shower pan may seem like a challenging task, but with proper planning and execution, you can ensure that your shower is a beautiful and functional part of your bathroom. By following our step-by-step guide, considering different types of shower pans, and weighing the pros and cons of DIY versus professional installation, you can make an informed decision. Remember to take your time and consult helpful resources when needed.


