I. Introduction
If you’re just starting on your crochet journey, learning how to make a granny square will unlock many possibilities for your future projects. Granny squares are typically small crocheted squares, often made with colorful yarn, that can be pieced together to form larger blankets, scarves, bags, and more. The beauty of a granny square is that you can experiment with various color combinations and patterns to create something truly unique.
Mastering the granny square will not only introduce you to the basic stitches in crochet but also give you the confidence to tackle more complex projects. This guide will walk you through the essential steps you need to create your first granny square. Additionally, it will provide a video tutorial, photo tutorial, a brief history, and interviews with experienced crocheters.
II. Step-by-Step Tutorial
Before beginning your granny square, make sure you have the following materials:
- Worsted-weight yarn in the colors of your choice
- Crochet hook (size G or H is recommended)
- Scissors
- Tapestry needle (to weave in ends)
Next, learn the basic stitches used in making a granny square: chain (ch), slip stitch (sl st), single crochet (sc), and double crochet (dc).
Here are the step-by-step instructions to create your granny square:
- To start, create a slip knot by making a loop with the yarn and pulling the end through the loop, creating a knot. Place the slip knot onto the hook and tighten it.
- Begin by chaining four stitches. Join them with a slip stitch to create a loop.
- Make three chains. This counts as the first double crochet stitch in the sequence.
- Make two double crochet stitches into the loop.
- Chain two stitches.
- Make three double crochet stitches into the loop.
- Chain two stitches.
- Make three double crochet stitches into the loop.
- Chain two stitches.
- Make three double crochet stitches into the loop.
- Chain two stitches. Then join with a slip stitch to the top of the first chain.
- Fasten off by cutting the yarn and pulling the end through the loop. Use the tapestry needle to weave in ends.
Once you have grasped the basic granny square pattern, you can experiment with different variations, including the shape and the color combinations. You can change the size of your granny square by adding or decreasing the number of rows. Don’t be afraid to play around and explore what works best for you!
III. Video Tutorial
Some people find it easier to learn new techniques visually. A video tutorial can help you see how each step of creating a granny square is done. Here’s a beginner-friendly video tutorial that will guide you step-by-step through creating a granny square:
How to Crochet a Granny Square for Beginners
Don’t forget to pause and replay sections of the video as necessary and take your time to master each step.
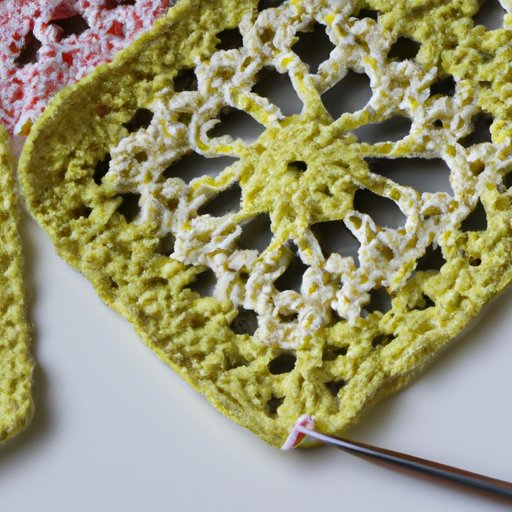
IV. Photo Tutorial
If you prefer to learn at your own pace, a photo tutorial can help you see each step in a more detailed way. Here is a photo tutorial to help you create a traditional granny square:
- Start with a slip knot.
- Chain four stitches and join with a slip stitch to form a chain ring.
- Chain three stitches (counts as the first double crochet).
- Make two double crochet stitches into the chain ring.
- Chain two.
- Make three double crochet stitches into the chain ring.
- Chain two.
- Repeat steps 5-7 twice to complete three clusters of three double crochet separated by two chains.
- Join with a slip stitch to close the round.
- Change to a new color and chain three stitches (counts as the first double crochet).
- Make two double crochet stitches into the chain-two corner space of the round below.
- Chain two.
- Make three double crochet stitches into the same corner space.
- Chain one stitch.
- Make three double crochet stitches into the next corner space.
- Chain two, and continue to repeat steps 12-15 for the remaining two corners.
- Join with a slip stitch to close the round and fasten off. Use the tapestry needle to weave in the ends.


With the help of these tutorials, you’ll be creating beautiful granny squares in no time!
V. Historical Perspective
Knowing the history of the granny square can give you a greater appreciation for the craft. Granny squares have been around for centuries, starting as far back as the Victorian era. Originally, small scraps of yarn and fabric were used to create patchwork blankets and covers.
By the 1960s and 1970s, granny squares became a popular symbol of the counterculture movement. Crochet was no longer an activity just for grandmothers but was embraced by a younger generation of crafters. Today, granny squares continue to be a timeless favorite among crochet enthusiasts of all ages.
VI. Interview Someone
Getting advice from someone who has mastered the craft will provide additional insights and tips that can help you perfect your technique. We interviewed Jane, a seasoned grandmother from the UK who has been crocheting for over 40 years.
“My best advice for creating the perfect granny square is to always count your stitches,” Jane suggests. “It’s easy to miss a stitch or make one too many, which can throw off your square. Also, try different yarn weights and hooks to see what you like best.”
Jane emphasizes that planning your color scheme and stitching techniques can make a significant impact on your final project. “I enjoy working with brighter colors and playing with the different stitch patterns such as the shell stitch.”
VII. Conclusion
Congratulations! You have learned the basic steps of creating a granny square, and with the help of additional tutorials and advice, you can now create many variations of crochet projects. Remember to practice often and be patient with yourself. Crochet is a beautiful and rewarding skill that will give you joy for years to come.
Whether you are a beginner or experienced crocheter, the granny square is fundamental to your craft. By learning how to create them, you will not only expand your skillset, but you will also be able to apply the granny square to countless projects.


