Introduction
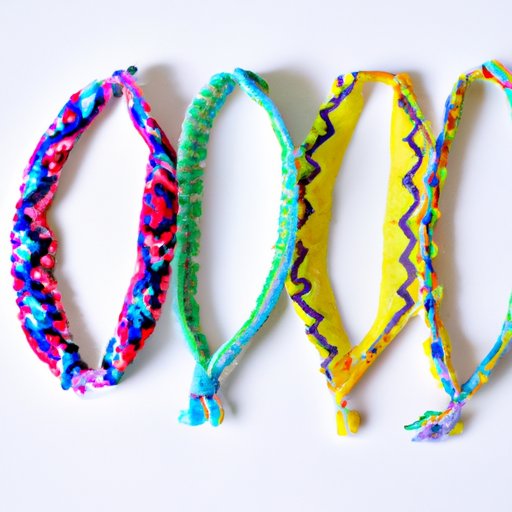
Friendship bracelets have been a popular hand-made accessory for decades. They are not only fun to make but also a great way to show a friend how much you care. Making friendship bracelets is a simple and rewarding activity that can be enjoyed by both children and adults. This article serves as a step-by-step guide to making friendship bracelets, providing tips, techniques, and ideas for creating beautiful, unique bracelets.
Step-by-Step Guide
Before you begin making friendship bracelets, you will need a few essential supplies, such as embroidery floss, scissors, and a clipboard or knotting board. For beginners, it is best to start with simple patterns and knots. The two most basic knots for making friendship bracelets are the forward knot and the backward knot.
Materials Needed for Making Friendship Bracelets
To make friendship bracelets, you will need the following materials:
- Embroidery floss
- Scissors
- Clipboard or knotting board
Basic Knotting Techniques for Making Friendship Bracelets
The forward knot is made by placing one color of floss over the other and tying it in a knot. The backward knot is the opposite of the forward knot, where the working thread goes behind the other thread.
Step-by-Step Instructions for Making a Basic Friendship Bracelet
To make a basic friendship bracelet, follow these steps:
- Cut four pieces of embroidery floss, each about 12 inches.
- Make a knot at one end, securing all four strands together.
- Attach the knot to a clipboard or knotting board to secure the strands.
- Arrange the strands in the following order: 1, 2, 3, 4.
- Take the first strand and make a forward knot over the second strand, pulling it through the loop.
- Next, make a forward knot with the first strand over the third strand, pulling it through the loop.
- Then, take the first strand and make a backward knot over the second and third strands, pulling it through the loop.
- Repeat these steps, making sure the knots are tight and the pattern is consistent.
- When the bracelet is the desired length, tie a knot at the end, securing all four strands together.
- Trim any excess floss, and your bracelet is complete.
Video Tutorial
For visual learners, video tutorials can be especially helpful. Below is a link to a video tutorial on making friendship bracelets:
https://www.youtube.com/watch?v=abf62W0IbYg
Accompanying Article Discussing the Key Points in the Video Tutorial
The video tutorial provided a step-by-step guide on how to make a classic friendship bracelet pattern in a rainbow color scheme. The video demonstrated the basic knotting techniques, including the forward knot and backward knot. The pattern included four strands of floss and involved repeating the same pattern over and over. The video tutorial is especially helpful for those who learn better through visual demonstrations.
Beginner’s Guide
As a beginner, it may be overwhelming to choose a pattern to follow. It is best to start with simple patterns before progressing to more complicated designs. The following are some of the different types of friendship bracelet patterns.
Overview of Different Types of Friendship Bracelet Patterns
Some friendship bracelet patterns include:
- Chevron
- Simple diagonal stripes
- Chinese staircase
- Heart pattern
Key Techniques Beginners Should Know
Some essential techniques a beginner should know include:
- Forward Knot
- Backward Knot
- Adding Beads
- Starting and Finishing
Tips for Making Perfect Bracelets
Here are some tips to help you make the perfect friendship bracelet:
- Use quality materials
- Avoid tangling the threads while knotting
- Keep the knots consistent
- Practice on shorter strands before attempting a full-length bracelet
- Relax and enjoy the process
Top 10 Bracelet Patterns
Friendship bracelets come in all shapes and sizes. Here are the top 10 most popular and easy-to-make bracelet patterns:
1. Candy Stripe
To make a candy stripe friendship bracelet, follow these steps:
- Cut four strands of embroidery floss in two colors, each about 16 inches.
- Tie the strands together and begin knotting with one color.
- After several knots, tie the other color on, and continue knotting.
- Alternate knots with each color until you have the desired length.
- Tie a knot at the end of the bracelet, and trim the excess floss.
2. Chevron
To make a chevron friendship bracelet, follow these steps:
- Choose four colors of embroidery floss, and cut two skeins of each.
- Arrange the strands in the following order: 1, 2, 3, 4.
- Using the forward knot, knot the first strand over the second.
- Then knot the second strand over the third.
- Continuing with the same process, knot the first strand over the second and third strands.
- Knot the fourth strand over the second and third strands.
- Repeat the pattern until the desired length is reached, and tie a knot at the end.
3. Hearts
To make a heart friendship bracelet, follow these steps:
- Cut two pieces of red and one piece of pink embroidery floss, each about 36 inches.
- Tie the strands together, leaving a 2-inch tail.
- Make a V-shape with the left strand over the middle strand, and then make a similar shape with the right strand.
- Thread the pink string through the V-shape, beginning on the left.
- Keeping the pink string behind the other strands, make two forward knots with the left strand.
- Make two forward knots with the right strand.
- Thread the pink strand through the right V-shape.
- Continue knotting and threading, forming hearts.
- When you reach the desired length, tie a knot and trim any excess floss.
4. Diamond
To make a diamond friendship bracelet, follow these steps:
- Cut four pieces of different-colored embroidery floss in a shade set, each about 12 inches.
- Place the floss together and tie a knot at the end, leaving a short tail.
- Arrange the strands in the following order: 1, 2, 3, 4.
- Take the first string and make forward knots over the second and third strings.
- Repeat with the fourth string over the second and third strings.
- Take the first string and make a backward knot over the fourth string.
- Repeat with the fourth string over the first string.
- Continue this pattern until you reach the desired length, and tie a knot at the end.
5. Fishtail
To make a fishtail friendship bracelet, follow these steps:
- Choose three colors of embroidery floss.
- Fold each string in half and knot them together at the top.
- Take the left outermost string and tie it in a knot over the middle two strings.
- Take the right outermost string and tie it in a knot over the middle two strings.
- Alternate knots, starting with the left string once, then the right string until you reach the desired length.
- Tie a knot at the end, and you’re done!
6. Braided
To make a braided friendship bracelet, follow these steps:
- Cut three strands of embroidery floss in one or more colors, each about 24 inches.
- Tie all three strands together at one end.
- Braid the floss, keeping it as tight as possible.
- When you reach the desired length, tie a knot at the end, and trim the excess floss.
7. Twist
To make a twist friendship bracelet, follow these steps:
- Cut four different-colored strands of embroidery floss, each about 24 inches.
- Tie the strands together at one end.
- Divide the floss into two groups, 1 and 2.
- Take the right strand in group 1 and twist it clockwise until it is the left strand in group 2.
- Repeat with the other strands, alternating between groups 1 and 2.
- When you reach the desired length, tie a knot at the end, and you’re done!
8. Beaded
To make a beaded friendship bracelet, follow these steps:
- Choose your beads and embroidery floss.
- Cut a piece of floss and tie a knot at one end.
- Thread a bead onto the floss and tie a knot on either side of the bead to keep it in place.
- Repeat with as many beads as you like.
- Once you have added all your desired beads, tie a knot at the end, and trim the excess floss.
9. Arrowhead
To make an arrowhead friendship bracelet, follow these steps:
- Cut three strands of different-colored embroidery floss, each about 24 inches.
- Tie the strands together at one end.
- Attach the bracelet to a clipboard or knotting board.
- Take the left string and make a backward knot over the middle string.
- Repeat with the right string, making a backward knot over the middle string.
- Repeat this pattern until you have the desired number of knots.
- When you have reached the desired length, tie a knot at the end, and you’re done!
10. Zippy Chain
To make a zippy chain friendship bracelet, follow these steps:
- Cut three long pieces of embroidery floss in different colors.
- Knot them together at one end and tape the knot down to a flat surface.
- Separate the strands and begin braiding them, keeping it as tight as possible.
- Once you have braided a few inches, tie a knot at the end and add a bead.
- Continue braiding, alternating between braiding and adding a bead with each cycle.
- When you reach the desired length, tie a knot at the end, and you’re done!
Seasonal Bracelet Patterns
Friendship bracelets can also be made seasonally inspired. Below are some examples of summer-inspired and winter-themed patterns.
Summer-Inspired Patterns Featuring Bright Colors
A beachy color palette, such as blues and yellows, is perfect for summer. Here’s an example of a summer-inspired friendship bracelet pattern:
- Cut six strands of embroidery floss in different shades of blue and yellow.
- Tie the strands together at one end and divide them into three groups of two.
- Knot each group of two together at the 7-inch mark.
- Begin braiding the three groups, incorporating the knots into the braid.
- Add beads or charms to the end, if desired.
- When you have reached the desired length, tie a knot at the end, and you’re done!
Winter-Themed Patterns Featuring Blue and White
A winter-inspired friendship bracelet pattern can be achieved with a cool color palette. Here’s an example of a winter-themed friendship bracelet pattern:
- Cut six strands of embroidery floss in various shades of blue and white.
- Tie the strands together at one end and divide them into three groups of two.


