Introduction
The art of paper folding, which originated in Japan, has become a popular craft activity all over the world. Paper cranes, in particular, have captured the imagination of makers of all ages, thanks to their elegance and simplicity. Whether you’re an experienced origami artist or a complete beginner, making paper cranes can be a fun and therapeutic activity. In this article, you’ll learn how to make paper cranes, explore the history and folklore behind this popular craft, and discover some pro tips and creative ideas for taking your paper folding skills to the next level.
Simple Guide: A Step-by-Step Tutorial on How to Make a Paper Crane
To make a basic paper crane, you will need a square piece of origami paper, which is specially designed for this craft. If you’re new to origami, it might be helpful to start with a larger piece of paper, so that the folds are easier to manage. Follow these steps to make a simple paper crane:
- 1. Start with your square piece of paper, with the colored side facing down.
- 2. Fold the paper in half diagonally, crease it, and open it up again.
- 3. Fold the paper diagonally the other way, crease it, and open it up again.
- 4. Flip the paper over, so that the colored side is facing up.
- 5. Fold the paper in half, crease it, and open it up again.
- 6. Fold the paper in half the other way, crease it, and open it up again.
- 7. Fold the paper in half vertically, so that the edges meet in the middle. Crease it.
- 8. Bring the top edge of the paper down to the bottom edge, aligning it with the crease in the middle. Crease it. Unfold.
- 9. Fold the top right corner of the paper down to the middle crease, so that the new edge aligns with the previous edge. Crease it. Repeat on the left side.
- 10. Fold the top part of the paper down along the bottom edge, so that the edges meet at the bottom. Crease it.
- 11. Fold the paper in half along the previous crease, so that the wings stick out.
- 12. Gently pull the wings down, and then fold them up to form the head and tail of the crane.
- 13. Your paper crane is complete!
The Art of Origami: How to Fold the Classical Paper Crane
Origami, which literally means “paper folding” in Japanese, has been a popular art form in Japan for centuries. Paper cranes, in particular, have become a symbol of Japanese culture, representing good luck, longevity, and peace. Follow these steps to fold the classic paper crane:
- 1. Start with a square piece of origami paper, with the colored side facing down.
- 2. Fold the paper diagonally in half, crease it, and open it up again.
- 3. Fold the paper diagonally in half the other way, crease it, and open it up again.
- 4. Fold the paper in half vertically, crease it, and then unfold it.
- 5. Fold the paper in half horizontally, so that the top edge and the bottom edge meet in the center. Crease it and then unfold it.
- 6. Fold the top and bottom edges of the paper inwards, creasing them to create a diamond shape.
- 7. Fold the left and right corners of the diamond inwards, so that the edges meet in the middle. Crease them.
- 8. Fold the top part of the paper down along the bottom edge, so that the edges meet at the bottom. Crease it. Unfold.
- 9. Lift the top layer of the paper up, and fold it along the previous crease, so that the paper looks like a kite.
- 10. Fold the left and right sides of the top layer of paper inwards, creasing them.
- 11. Fold the top part of the paper down along the bottom edge, so that the edges meet at the bottom. Crease it.
- 12. Tuck the “flaps” of paper at the bottom of the model inside the fold, so that they’re not visible.
- 13. Gently pull the wings down and fold them up to form the head and tail of the crane.
- 14. Your classic paper crane is complete!
Of course, once you’re confident with the classic paper crane, you can start to experiment with different paper patterns and designs. Try adding wings to your paper crane to give it a more dynamic look, or try using printed paper to create a unique and colorful crane.
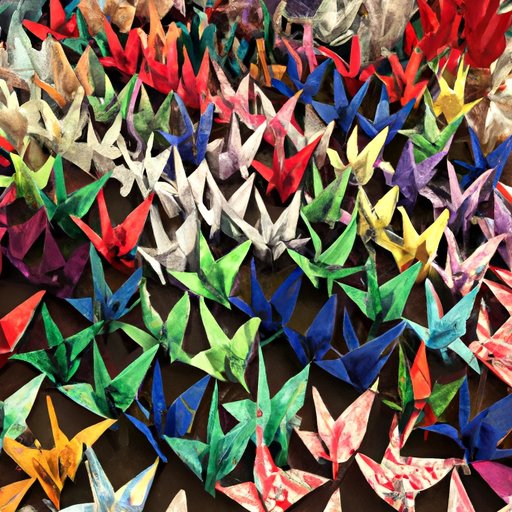
Japanese Folklore and Origami Traditions: The Story Behind the Paper Crane
The most famous origami story is that of the thousand paper cranes, or senbazuru. In Japanese folklore, it’s believed that folding 1,000 paper cranes will grant the maker a wish or luck. The story goes that a young Japanese girl named Sadako Sasaki developed leukemia after the Hiroshima atomic bombing and began to fold paper cranes in the hope of regaining health. Despite being unable to complete the full thousand, she continued to fold cranes until her death at the age of 12.
Today, the paper crane has become a symbol of peace and hope, and the story of Sadako has inspired many to fold paper cranes as a way of promoting peace and nuclear disarmament.
In addition to the story of Sadako, there are many other legends and traditions related to origami in Japan and other countries. For example, it’s said that folding 1,000 paper cranes and gifting them to a loved one can bring good luck and happiness. In Japanese weddings, a thousand paper cranes are often displayed as a symbol of good fortune and happy marriage.
Mastering the Art: Pro Tips on Making Perfect Paper Cranes
Making a paper crane can be tricky, especially for beginners. Here are some tips and tricks to help you achieve the perfect paper crane:
- 1. Use origami paper. Standard printer paper or construction paper is too thick and hard to fold correctly.
- 2. Be careful with your creases. Sharp, straight creases will make a big difference in the finished product.
- 3. Take your time. Origami is a slow, deliberate art form – rushing won’t help!
- 4. Watch video tutorials. Seeing someone else do it can help you understand how to do it yourself.
- 5. Don’t get discouraged. Origami takes skill and practice, so don’t worry if your first few attempts don’t turn out perfectly.
Some common mistakes in paper crane making can lead to frustration. For example, your paper might tear if you make a wrong crease or fold. Here are some troubleshooting tips to help you avoid common issues:
- 1. Check your paper size. Using paper that’s too small or too big can be difficult to manipulate.
- 2. Make sure your creases are sharp. A shaky crease can lead to paper tearing.
- 3. Don’t pull too hard on the paper. Delicate paper can tear under too much force.
- 4. Relax and take breaks. If you’re feeling frustrated, it’s okay to take a break and come back later.
Fold, Crease, and Repeat: The Therapeutic Benefits of Origami and Paper Crane Making
Making origami paper cranes has been found to have significant therapeutic benefits. For example, the slow, repetitive movements required for origami can promote mindfulness and relaxation, making it a great way to reduce stress.
Origami has also been used as a tool in cognitive therapy, to help with fine motor skills and memory retention. Some research has even suggested that origami can help improve spatial perception and hand-eye coordination.
Going Beyond Paper Cranes: Creative Origami Ideas and Inspirations
While paper cranes are a great place to start with origami, there are countless other things you can create using paper folding techniques. Try making flowers, animals, or geometric shapes to expand your origami skills.
There are plenty of online resources available for finding origami inspiration and tutorials. Websites like Origami-Instructions.com and OrigamiWay.com offer detailed instructions for a wide range of origami designs, while Pinterest and Instagram are great for finding visual inspiration and community.
Origami for All: How to Teach Kids and Beginners to Make Paper Cranes
Folding paper cranes can be a fun and engaging activity for children and beginners. Here are some tips for teaching others how to make a paper crane:
- 1. Start with simple designs. The basic paper crane design is a good place to start, but simpler designs might be good for beginners.
- 2. Use larger paper. Large paper is easier for beginners to work with, and is less likely to tear.
- 3. Give clear instructions. Speak slowly and clearly, breaking down each step of the process.
- 4. Show, don’t tell. Demonstrate each step as you go along.
- 5. Celebrate effort over results. Encourage your students to enjoy the process, rather than focusing on creating a “perfect” crane.
Incorporating origami into a school curriculum or extracurricular activity is a great way to promote creativity and cultural understanding. Teachers might consider creating origami lesson plans, or hosting an origami club to teach paper folding skills.
Conclusion
Making paper cranes is a fun and engaging activity that has something to offer everyone, regardless of age or skill level. Whether you’re folding a classic paper crane or experimenting with new designs, origami can be a therapeutic and fulfilling activity that yields beautiful results. We hope this guide has given you the inspiration and resources you need to discover your own love of paper folding.


