I. Introduction
Saurkraut is a delicious and versatile dish that has been enjoyed for centuries. It is made by fermenting cabbage, which creates a tangy and flavorful side dish or condiment. In recent years, there has been a surge of interest in making saurkraut at home. Not only is it a fun and rewarding process, but it also allows you to control the ingredients and create a healthier dish than store-bought versions.
In this article, we will explore the benefits of making your own saurkraut, provide step-by-step instructions for the fermentation process, and share creative ways to incorporate saurkraut into your meals.
II. “How to Make Saurkraut at Home: A Step-by-Step Guide”
Making saurkraut at home is easier than you might think. With a few simple steps, you can create your own homemade batch of this flavorful dish.
A. Gathering the necessary ingredients
To make saurkraut, you will need:
- 1 head of cabbage
- 1 tablespoon of salt
- Spices of your choice (optional)
- A glass jar or fermentation crock
B. Preparing the cabbage
Start by washing and shredding the cabbage into thin strips. Place the shredded cabbage in a large bowl and sprinkle with salt. Using your hands, massage the salt into the cabbage until it starts to release its juices.
C. Adding salt and spices
Add any spices you like to the cabbage mixture (caraway seeds, peppercorns, and juniper berries are common choices). Mix everything together until the spices are evenly distributed.
D. The fermentation process
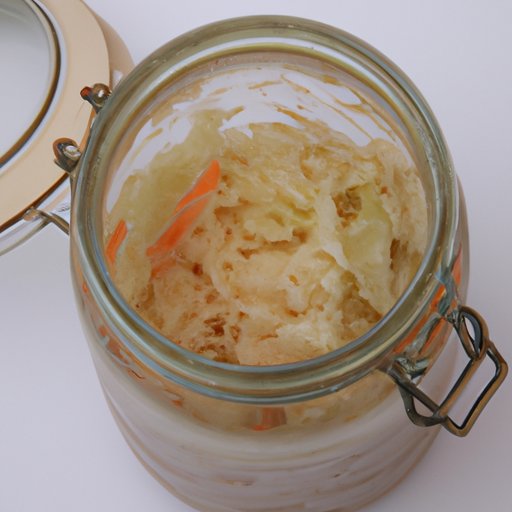
Once the cabbage and spices are mixed, transfer them to a glass jar or fermentation crock. Pack the cabbage down tightly using a wooden spoon or your hands. It’s important to make sure there are no air pockets in the jar.
Place a weight on top of the cabbage to keep it submerged in its own juices. This can be a smaller jar filled with water or a specially designed fermentation weight. Cover the jar with a lid or cloth to keep out bugs and dust.
Allow the saurkraut to ferment at room temperature for 1-4 weeks, depending on how tangy you like it. Be sure to check on it every few days to make sure the cabbage is fully submerged in the liquid.
E. Storing and using saurkraut
Once your saurkraut is ready, store it in the refrigerator for up to 6 months. It can be enjoyed on its own as a side dish, or used in sandwiches, soups, and other recipes.
III. “The Benefits of Making Your Own Saurkraut and How to Do It”
Making your own saurkraut has a variety of benefits, from health advantages to environmental sustainability.
A. Health benefits of saurkraut
Saurkraut is a probiotic-rich food that contains live cultures of beneficial bacteria. These bacteria help improve gut health, boost the immune system, and reduce inflammation. Saurkraut is also a low-calorie food that is high in vitamins C and K, as well as fiber.
B. Environmental benefits of making your own food
By making your own food, you can reduce your environmental impact by avoiding packaging waste and transportation emissions. Saurkraut is a great example of a food that can be made easily at home with minimal resources.
C. Tips for making saurkraut at home
To ensure successful fermentation, be sure to use clean equipment and keep everything sterile. Use high-quality ingredients, and experiment with different spices and flavors to find the perfect recipe for your taste.
IV. “5 Essential Tips for Perfect Saurkraut Every Time”
While making saurkraut is a simple process, there are a few key tips to keep in mind to ensure a successful batch every time.
A. Importance of using the right cabbage
Choose a firm, fresh cabbage for the best results. Avoid wilted or damaged leaves.
B. Getting the salt measurement right
The salt is important for drawing out moisture from the cabbage and creating the right environment for fermentation. Use a kitchen scale to measure the salt accurately.
C. How to properly pack the cabbage
Use your hands or a wooden spoon to pack the cabbage down tightly in the jar, eliminating any air pockets. This will help create the right environment for fermentation.
D. Properly sealing the container
Make sure the lid or cloth you use to cover the jar is secure, but allows some air to escape. This will prevent mold and other unwanted growth from forming on the saurkraut.
E. Making sure the saurkraut is properly fermented
Check on the saurkraut every few days to make sure it is submerged in liquid and not starting to dry out. Taste it regularly to see if it has reached your desired level of tanginess. Once it’s ready, store it in the fridge to slow down the fermentation process.
V. “Saurkraut 101: The Basics of Fermenting Your Own Cabbage”
Understanding the science behind saurkraut can help you create the best possible batch. Here are a few key things to keep in mind.
A. What is saurkraut?
Saurkraut is made by fermenting shredded cabbage in water and salt. As the cabbage ferments, beneficial bacteria convert sugars in the cabbage into lactic acid, which gives saurkraut its tangy flavor.
B. The health benefits of fermented foods
Many fermented foods, including saurkraut, are rich in probiotics, which are essential for gut health. They also contain enzymes and beneficial acids that can improve digestion and boost the immune system.
C. The science behind fermentation
Fermentation is the process by which beneficial bacteria break down sugars in food, producing lactic acid and other organic compounds. This process can be controlled by manipulating factors like temperature, salt content, and the presence of other microbes.
D. Tips for successful fermentation
To ensure successful fermentation, keep the temperature between 65-75°F, use the right amount of salt, and ensure that the cabbage is fully submerged in liquid. Avoid introducing unwanted bacteria or yeast to the mix, which can spoil the batch. Patience is key – fermentation takes time!
VI. “How to Make Saurkraut in Mason Jars: A Simple and Convenient Method”
Mason jars are a great option for making saurkraut at home. They’re easy to find, easy to clean, and the perfect size for a small batch.
A. Benefits of using mason jars
Mason jars are small enough to fit in the fridge, so you don’t need a separate container for storing the saurkraut. They also have a screw-on lid that makes it easy to check on the fermentation process.
B. Step-by-step instructions
Follow the same steps for making saurkraut as outlined in section II, but pack the cabbage mixture into a clean, sterilized mason jar. Place a weight on top of the cabbage to keep it submerged, then cover with a lid. Twist the lid loosely to allow air to escape during fermentation. Store in a cool, dark place for 1-4 weeks, checking regularly to make sure the cabbage is still submerged in liquid.
C. Tips for successful mason jar saurkraut
Use a smaller head of cabbage to make sure it fits in the jar, and pack the cabbage down tightly to eliminate air pockets. Twist the lid loosely to allow air to escape, but not so loose that it falls off. Sterilize the jar thoroughly before use to avoid introducing unwanted bacteria to the mix.
VII. “The Science of Saurkraut: Understanding the Fermentation Process”
Understanding the science behind fermentation can help you create the best possible batch of saurkraut. Here are a few key things to keep in mind.
A. The role of lactobacillus bacteria
Lactobacillus bacteria are the key players in the fermentation process. They convert sugars in the cabbage into lactic acid, which gives saurkraut its tangy flavor. These bacteria thrive in an anaerobic environment (meaning without oxygen), which is why it’s important to keep the cabbage fully submerged in liquid.
B. pH levels and acidity
The pH level of saurkraut is an important factor in the fermentation process. The ideal pH level for fermentation is between 4.2 and 3.6, which creates an acidic environment that is hostile to harmful bacteria. Check the pH level regularly, and adjust as necessary by adding more salt or water.
C. The difference between anaerobic and aerobic fermentation
Anaerobic fermentation takes place without oxygen, whereas aerobic fermentation uses oxygen to break down sugars. Saurkraut is a type of anaerobic fermentation, as it relies on lactobacillus bacteria that thrive in an oxygen-free environment.
D. How long to ferment saurkraut
The length of time needed for fermentation can vary depending on the temperature, salt content, and other factors. In general, saurkraut should be fermented for at least 1-2 weeks to achieve the desired flavor. Taste it regularly to check the progress, and adjust the time as necessary.
VIII. “Creative Ways to Enjoy Saurkraut at Every Meal: Recipes and Ideas”
Saurkraut is a versatile dish that can be used in a variety of recipes. Here are a few ideas to inspire your culinary creativity.
A. Classic recipes like Reuben sandwiches and saurkraut soup
Reuben sandwiches are a classic way to enjoy saurkraut. Layer thin slices of corned beef or pastrami, Swiss cheese, and saurkraut on rye bread and grill until crispy. Saurkraut soup is another traditional recipe that combines saurkraut with potatoes, onions, and smoked sausage for a comforting and hearty dish.
B. Innovative ways to incorporate saurkraut into everyday meals
Saurkraut adds a tangy crunch to salads, sandwiches, and burgers. Try topping a veggie or turkey burger with saurkraut, pickles, and mustard for a flavorful twist on a classic. Add saurkraut to stir-fries or omelets for a zesty boost of flavor.
C. Ideas for using saurkraut as a condiment or topping
Saurkraut can also be used as a topping for hot dogs, bratwurst, or grilled cheese sandwiches. Mix it with mayo or sour cream to create a tangy dip for veggies or chips. Or use it as a condiment for tacos or burritos. The possibilities are endless!
IX. Conclusion
Making saurkraut at home is a fun and rewarding process that allows you to create a healthy and delicious dish. With the tips and techniques outlined in this article, you can make your own batch of saurkraut with confidence.


