Introduction
Plumerias are one of the most popular tropical plants, cherished for their fragrant blooms and beautiful colors. While they can be grown from seeds, many gardeners prefer to grow plumerias from cuttings for various benefits. In this article, we will provide the ultimate guide to propagating plumeria cuttings, from the different types of cuttings to the best time to take them and how to care for them.
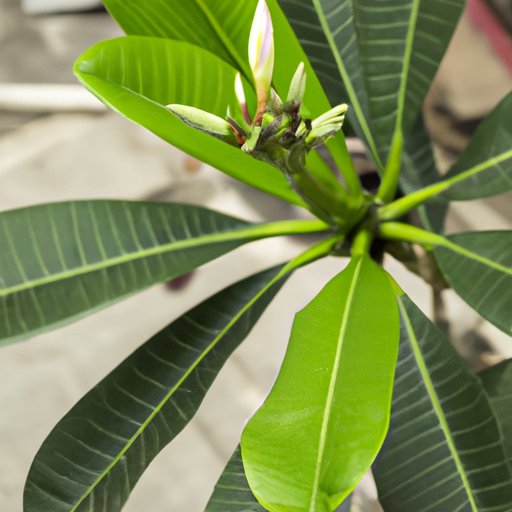
The Ultimate Guide to Growing Plumeria from Cuttings
Growing plumeria from cuttings is easier than growing from seeds. Plumeria cuttings are genetically identical to the parent plant, ensuring the same color and fragrance of the blooms. Unlike seeds, cuttings can produce flowers within the first year of planting. Moreover, taking cuttings does not harm the parent plant, making it a sustainable and efficient method of propagation.
There are several types of plumeria cuttings, including tip cuttings, node cuttings, and whole-branch cuttings. Tip cuttings are the most common type, taken from the end of a branch. Node cuttings are taken from the joint where the leaves meet the stem. Whole-branch cuttings are taken from the main stem of the plant. Each type has its advantages and disadvantages depending on your skill level and growing conditions.
The best time of year to take plumeria cuttings is during the active growing season, usually from May to October. You should choose cuttings from healthy, established plumerias that are not flowering. Cuttings should be at least 12 inches long and have several nodes or leaves.
Step-by-Step: How to Take and Root Plumeria Cuttings
Step 1: Preparing the Tools and Workspace
Before taking the cuttings, you should prepare the tools and workspace. You will need a sharp, clean pruning shears or a knife, rooting hormone powder, a container for rooting, and a well-draining soil mix. You should also sterilize your tools with rubbing alcohol or bleach to minimize the risk of disease transmission.
Step 2: Choosing the Right Branches or Stems for the Cuttings
Select branches that are healthy, not too young or too old, and from a parent plant that is thriving. Avoid using branches that are damaged, diseased, or stressed. Cuttings should have at least two nodes and no flowers or buds.
Step 3: Cutting and Treating the Plumeria Branches for Optimal Root Growth
Cut the branches at a 45-degree angle just below a node using sharp, clean pruning shears or a knife. Remove the bottom leaves and dip the end of the cutting in rooting hormone powder. Tap off any excess powder and let the cuttings dry for an hour or two to avoid fungal infections.
Step 4: Preparing the Soil and Container for Planting
Use a well-draining soil mix that is sandy and nutrient-poor. You should choose a container that is slightly larger than the cutting, with drainage holes at the bottom. Fill the container with the soil mix and water it to settle the soil.
Step 5: Planting the Cuttings and Caring for Them During the Root Development Stage
Make a hole in the soil with your finger and insert the cutting halfway. Firm the soil around the cutting and water it gently. Cover the container with a clear plastic bag or dome to create a humid environment. Place the container in a warm, bright spot, but not in direct sunlight. After a few weeks, roots should start to form. Keep the soil moderately moist but not wet, and avoid overwatering. Once the roots have filled the container, you can transplant the cutting into a larger pot or into the ground.
The Dos and Don’ts of Propagating Plumeria from Cuttings
To ensure that your plumeria cuttings thrive and grow into healthy plants, keep in mind the following dos and don’ts:
Dos:
– Provide ample sunlight, water, and nutrients to aid growth
– Monitor the health of your cuttings closely
– Keep the soil moderately moist but not wet
– Use a well-draining soil mix that is sandy and nutrient-poor
Don’ts:
– Overwater your cuttings
– Expose them to extreme heat or cold
– Disturb the roots or medium during the root development stage
Secrets to Plumeria Propagation Success: Tips and Tricks
How to Speed up the Rooting Process
You can speed up the rooting process by using a heating pad or a warm area in your house. The ideal temperature for plumeria roots to form is between 70 and 85 degrees Fahrenheit. You can also cover the container with a clear plastic bag or dome to create a humid environment and encourage root growth.
How to Prevent Common Plumeria Cutting Problems
To prevent common plumeria cutting problems, such as rot and pest infestation, you should use a well-draining soil mix, avoid overwatering, and plant the cuttings in a warm, bright spot but not in direct sunlight. You should also keep an eye on your cuttings for any signs of disease or pests and treat them promptly.
How to Transplant the Rooted Cuttings into Larger Pots or into the Ground
Once the roots have filled the container, you can transplant the rooted cuttings into larger pots or into the ground. Choose a location with well-draining soil and full sun exposure. Dig a hole slightly larger than the root ball and gently remove the cutting from the container. Place the cutting in the hole and fill it with soil. Water the cutting thoroughly and continue to monitor its growth and health.
Expert Advice: How to Grow a Thriving Plumeria Garden from Cuttings
To grow a thriving plumeria garden from cuttings, keep in mind the following tips and strategies:
– Choose a location with full sun exposure and protection from cold winds
– Use a well-draining soil mix and fertilize the plants with a balanced fertilizer every two weeks during the growing season
– Water the plants deeply but infrequently, letting the soil dry out between watering
– Prune the branches in late winter or early spring to maintain the desired shape and size
– Monitor the plants for any signs of disease or pests and treat them promptly
Plumeria Cuttings: A Beginner’s Guide to Growing Beautiful Blooms
If you are new to plumeria cuttings, here are some things to keep in mind:
– Plumerias are relatively easy to grow from cuttings, but they require patience, care, and attention to detail.
– Choose plumeria cultivars that suit your climate and preferences, and that are disease-resistant and easy to grow.
– Follow the steps and tips provided in this article to ensure the best chances of success.
– Enjoy the beauty and fragrance of your plumeria garden, and share the joy with others.
Conclusion
In conclusion, propagating plumeria cuttings is an excellent way to grow beautiful blooms and expand your plumeria garden. Whether you are a beginner or an experienced gardener, following the steps and tips provided in this article will help you achieve success. Remember to choose healthy branches, use well-draining soil, and provide adequate sunlight, water, and nutrients. With patience and care, you can enjoy the rewards of growing plumerias from cuttings for years to come.


