Introduction
Have you ever needed to take a screenshot on your computer, but didn’t know how? Whether it’s for work, school, or personal use, taking screenshots can come in handy in many situations. Screenshots can be used to capture images, text, or even error messages on your computer. In this article, we’ll explore different ways to take screenshots on a computer, including using built-in tools, keyboard shortcuts, and third-party software.
Step-by-Step Guide to Taking Screenshots
One of the easiest ways to take a screenshot on a computer is by using the Print Screen button and an image file editor. Follow these simple steps:
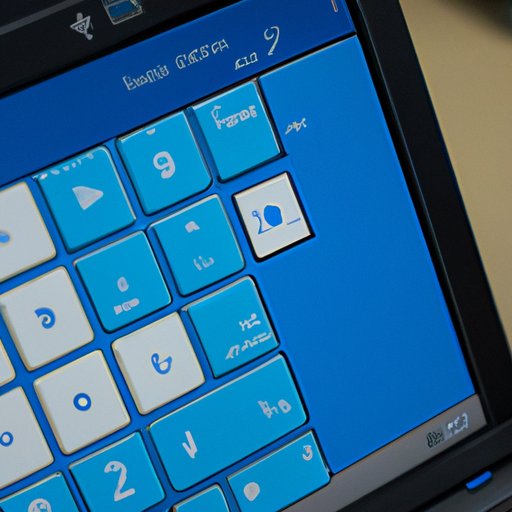
Step 1: Locate the Print Screen button on your keyboard
The Print Screen button is typically located in the top-right corner of your keyboard. It may be labeled “PrtScn” or “PrtSc”. On some keyboards, you may need to hold down the “Fn” key to access the Print Screen function.
Step 2: Press the Print Screen button
Press the Print Screen button to take a screenshot of your entire screen. If you only want to capture a certain area of the screen, use the Snipping Tool or Grab tool (see section III) or keyboard shortcuts (see section IV).
Step 3: Open an image file editor
Open an image editing program such as Microsoft Paint or Adobe Photoshop. These programs allow you to edit and save your screenshots as image files.
Step 4: Paste the screenshot onto the editor
Press “Ctrl” + “V” or right-click and select “Paste” to paste the screenshot onto the editor.
Step 5: Save the screenshot
Click “File” and select “Save As” to save your screenshot as an image file. Choose a file name and select a file format such as JPEG or PNG. Click “Save” to save your screenshot.
Using Built-in Tools
Many computer operating systems come with built-in screenshot tools. These tools allow you to capture your screen, a window, or a specific area of the screen without using an image editing program. Let’s explore two popular built-in screenshot tools:
Explanation of the built-in screenshot tools
Windows and Mac computers both have built-in screenshot tools. On Windows, you can use the Snipping Tool, while on Mac, you can use the Grab tool. These tools allow you to capture screenshots of your screen, a window, or a specific area of the screen.
How to use the Snipping Tool on Windows computers
The Snipping Tool is available on Windows 10, 8, and 7. Here’s how to use it:
- Open the Snipping Tool by clicking on the Windows Start menu and searching for “Snipping Tool”.
- Click “New” to capture a new screenshot.
- Select the area of your screen you want to capture by dragging the cursor around it.
- Click “File” and select “Save As” to save your screenshot.
How to use the Grab tool on Mac computers
The Grab tool is available on Mac computers. Here’s how to use it:
- Open the Grab tool by searching for it using Spotlight Search or by navigating to Applications > Utilities > Grab.
- Select the type of screenshot you want to take (e.g. screen, window, or selection).
- Select the area of your screen you want to capture by dragging the cursor around it.
- Click “File” and select “Save” to save your screenshot.
Overview of additional features available in each tool
Both the Snipping Tool and Grab tool offer additional features, such as the ability to delay the screenshot or capture a screenshot with a timer. Check out the Help menu in each tool to learn more.
Keyboard Shortcuts
Using keyboard shortcuts is a quick and easy way to capture screenshots on your computer. Keyboard shortcuts allow you to take screenshots of your entire screen or a specific area of the screen without having to use an image editing program or built-in tool. Here’s how:
Explanation of keyboard shortcuts
Keyboard shortcuts are a combination of keys that perform a specific function. On Windows and Mac computers, you can use keyboard shortcuts to take screenshots without using an image editing program or built-in tool.
How to take a screenshot using keyboard shortcuts on Windows and Mac computers
Here are the keyboard shortcuts to take a screenshot on Windows and Mac computers:
| Operating System | Keyboard Shortcut | Function |
|---|---|---|
| Windows | Windows key + Print Screen | Captures entire screen and saves to “Pictures” folder |
| Mac | Command + Shift + 3 | Captures entire screen and saves to desktop |
| Mac | Command + Shift + 4 | Allows you to select an area of the screen to capture and saves to desktop |
Benefits of using keyboard shortcuts
Using keyboard shortcuts to take screenshots is faster than using an image editing program or built-in tool. It also allows you to capture a specific area of the screen without having to crop the image later.
Third-Party Software
There are many third-party software options available for taking screenshots on a computer. These tools offer additional features and greater flexibility than built-in tools or keyboard shortcuts. Here are two popular options:
Explanation of third-party software options
Third-party software options, such as Lightshot and Snagit, offer additional features for taking screenshots, such as the ability to annotate or edit the screenshot before saving it.
Overview of popular options such as Lightshot and Snagit
Lightshot and Snagit are two popular third-party screenshot tools. Lightshot is a free tool that allows you to capture your screen, a window, or a specific area of the screen. Snagit is a paid tool that offers additional features such as image editing, video recording, and the ability to capture scrolling windows. Both tools are available for Windows and Mac computers.
How to use these tools to take screenshots
Here’s how to use Lightshot and Snagit to take screenshots:
- Lightshot: Install Lightshot on your computer and press the Print Screen button. Select the area of the screen you want to capture and edit or save the screenshot as needed.
- Snagit: Install Snagit on your computer and open the program. Select the type of screenshot you want to take and capture the screenshot. Edit or save the screenshot as needed.
Overview of additional features available in each tool
Lightshot and Snagit offer additional features, such as the ability to annotate or edit the screenshot before saving it. Check out the documentation for each tool to learn more.
Screenshots for Video Tutorials
Screenshots can be a valuable tool when creating video tutorials. They allow you to illustrate key points and highlight important information for viewers. Here’s how to take screenshots while creating a video tutorial:
Explanation of the purpose of screenshots in video tutorials
Screenshots are a useful tool for video tutorials because they provide visual aids for viewers. Screenshots can be used to show keyboard shortcuts, highlight important buttons, or display error messages.
How to take screenshots while creating a video tutorial
To take screenshots while creating a video tutorial, use built-in tools, keyboard shortcuts, or third-party software to capture the screenshot. Then, import the screenshot into your video editing software and place it where you want it to appear in the video.
How to insert screenshots into a video tutorial
To insert a screenshot into a video tutorial, import the screenshot image file into your video editing software. Place the screenshot in the desired location in the video timeline and adjust the duration as needed. Add any necessary text, annotations, or callouts to the screenshot.
Troubleshooting
While taking screenshots can be a simple process, there are common issues that may arise. Here are some troubleshooting tips:
Overview of common issues with taking screenshots
- Screenshot appears blurry or distorted
- File is too large to email or upload
- Screenshot captures unwanted elements
Explanation of solutions to these issues
- Blurry or distorted screenshot: Check the resolution of your screen and the screenshot image file. Make sure they are the same resolution for best results.
- File is too large: Use an image editor to compress the file size or save the file in a lower resolution format.
- Captures unwanted elements: Use the Snipping Tool, Grab tool, or keyboard shortcuts to capture a specific area of the screen instead of the entire screen.
Tips for avoiding these issues in the future
- Check the resolution of your screen and the screenshot image file before taking a screenshot
- Use the Snipping Tool, Grab tool, or keyboard shortcuts to capture a specific area of the screen, rather than the entire screen
- Use an image editor to compress the file size or save the file in a lower resolution format before sending or uploading it
Conclusion
In conclusion, taking screenshots on a computer is a useful skill that can save time and help illustrate important information. There are many different ways to take screenshots, whether you use built-in tools, keyboard shortcuts, or third-party software. By following the step-by-step guide and troubleshooting tips in this article, you can easily take high-quality screenshots on your computer.


