Introduction
When it comes to fishing and other outdoor activities, having the right knot can make all the difference. One of the most versatile and useful knots is the loop knot. This knot creates a non-slip loop at the end of a line, where you can attach hooks, lures, and swivels. The loop knot is ideal for fishing because it allows the bait to move more freely and naturally in the water, and it’s less likely to come undone or get tangled. But the loop knot is also useful for camping, boating, and wilderness survival, where you may need to tie down gear or rig up emergency shelters. In this article, we’ll explore everything you need to know about tying a loop knot, from the basic steps to expert tips and variations.
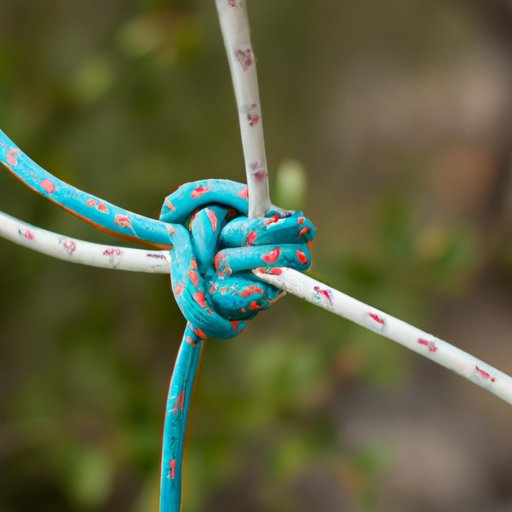
The Beginner’s Guide to Tying a Loop Knot: Easy Steps for Fishing and More
If you’re new to knot tying, no need to worry, tying a simple loop knot is easy and straightforward. One of the most popular loop knots is the “overhand loop” or “perfection loop”. Here’s how you can tie it quickly:
Step 1: Form a loop at the end of the line, making sure the tag end sits above the standing line.
Step 2: Take the tag end and pass it through the loop from the back to the front, creating a second loop beside the first one.
Step 3: Hold onto the second loop with one hand and make a third loop by bringing the tag end over and around the standing line.
Step 4: Take the tag end and pass it through the second loop you created in Step 2, from the front to the back, and then pull it all the way through.
Step 5: Hold onto the standing line with one hand and the tag end with the other hand, then gently pull both ends to tighten the knot.
Adjust the loop size by holding onto the tag end and pulling it gently to shrink the loop or releasing it to enlarge the loop. Repeat this process until you get the size you need. You can secure the knot by moistening it with your saliva or water and tightening it firmly.
Mastering the Loop Knot: Tips from Professional Anglers
To take your loop knot game to the next level, you can learn from the experts. Experienced anglers and guides can show you some time-saving and advanced techniques for tying a loop knot that’s customized to your fishing style and gear. Here are some tips from professional anglers:
Tip 1: Use a loop knot that suits the type of line and lure you’re using. For example, a thicker line may require a larger loop knot, while a smaller lure may benefit from a smaller loop knot.
Tip 2: Practice tying the knot until you can do it without looking. This will save you time and frustration when you’re on the water, especially in low-light conditions or when your hands are wet or cold.
Tip 3: Use a loop knot when you’re fishing with braided line, as this type of line tends to slip more easily with other knots.
Tip 4: Double up on the loop knot when you’re trolling or casting heavy lures, as this can prevent the knot from slipping or breaking under pressure.
Tip 5: Don’t over-tighten the knot, as this can weaken the line or cause it to break. Instead, tighten the knot just enough to make it firm and secure.
DIY Knot-Tying: How to Tie a Loop Knot with Everyday Materials
If you don’t have fishing line or other specialized materials on hand, you can still practice tying a loop knot with everyday materials such as rope, yarn, or twine. Here’s how you can tie an overhand loop knot with these materials:
Step 1: Make a loop with the material, just like you would with fishing line.
Step 2: Pass the end of the loop over and around the standing line, creating a second loop beside the first one.
Step 3: Take the end of the loop and pass it through the second loop, from the back to the front, and then pull it all the way through.
Step 4: Hold onto both ends of the material and tighten the knot by pulling them gently.
Keep in mind that these materials may not be as strong or reliable as fishing line, and they may not hold up well in wet or windy conditions. However, practicing with these materials can still help you improve your knot-tying dexterity and creativity.
The Top 5 Loop Knots Every Outdoorsman Should Know
While the overhand loop knot is versatile and simple, there are many other loop knot variations that are popular and useful for different outdoor activities. Here are five loop knots that you can learn and master:
1. The Surgeon’s Loop: This knot is easy to tie and strong, making it ideal for attaching a leader to the line or making a quick loop on the fly. To tie it, form a double overhand knot in the line, then pass the tag end through the loop twice before tightening it.
2. The Bowline Knot: This knot is excellent for boating, camping, or rock climbing, as it creates a fixed loop that won’t slip or loosen. To tie it, form a small loop at the end of the line, then pass the end of the line over and under the loop before bringing it back up and through the loop again.
3. The Double Uni Knot: This knot is ideal for joining lines of different diameters or materials. To tie it, overlap the two lines and make a loop with the first line, then take the tag end of the second line and pass it through the loop twice before pulling both ends tight.
4. The Yucatan Knot: This knot is a variation of the double overhand loop and is popular for saltwater fishing. To tie it, make a loop in the line, then wrap the tag end around the standing line and pass it through the loop twice before tightening it.
5. The Bimini Twist: This knot is a bit more complicated but is worth learning if you want to create a strong, shock-absorbing loop for big-game fishing. To tie it, make a small loop at the end of the line, then twist the line around itself until you have 20-30 twists. Pass the loop through the twisted section and make a second loop, then tighten the knot while keeping the twists untangled.
Tying It All Together: The Art and Science of the Loop Knot
Beyond being a practical skill, knot-tying can also be a craft or an art form. The loop knot is a prime example of how you can combine science, skill, and creativity to create a strong and beautiful knot. However, even the best knot-tyers may encounter some challenges along the way. Some factors that can affect the strength and reliability of the loop knot include:
-The type of material you’re using (e.g. braided line, monofilament, fluorocarbon)
-The weight and size of the lure or hook
-The temperature and humidity of the environment
-The tightness and placement of the knot
To improve your knot-tying abilities, consider joining a community or group that shares your passion for fishing or outdoor activities. You can also challenge yourself by trying new variations of the loop knot or experimenting with different materials. Practice makes perfect, and the more you tie, the better you’ll get at it.
Avoiding Tangles: Why the Loop Knot is Essential for Fly Fishing
Fly fishing is a specialized form of fishing that requires precision, patience, and finesse. One way to ensure that your fly (the imitation bug or bait) behaves as naturally as possible in the water is to use a loop knot when you tie it to the leader. The loop knot allows the fly to move more freely and smoothly, and it also reduces the risk of tangling or fouling (when two or more lines get twisted together). If you use other knots, such as the clinch knot, the improved clinch knot, or the Palomar knot, you may experience more tangles or lost fish. To tie a loop knot for fly fishing, follow the same steps as for the overhand loop, but adjust the size and tension of the loop to suit your fly and leader.
Loop Knots for Survival: How to Secure Your Gear in the Wild
In a survival situation, having the right knot can be a matter of life or death. Loop knots can be particularly useful for securing your gear, setting up shelters, or rappelling down steep cliffs. Some scenarios where you might need a loop knot include:
-Tying a tarp or poncho to a tree or pole to create a shelter from rain or wind
-Hang up food or supplies high above the ground to keep them out of reach of animals
-Tie a rope or cord to your backpack or body to lower yourself down a cliff or crevasse
To prepare yourself for survival situations, make sure you practice tying loop knots with different types of materials and under various conditions (such as wind, rain, or low light). Also, study up on other essential survival skills, such as fire starting, navigation, and first aid.
Conclusion
Tying a loop knot is a vital skill for fishing and other outdoor activities, but it’s also a fun and rewarding hobby in itself. Whether you’re a beginner or an experienced angler, you can always learn more about the art and science of knot-tying. By following the steps and tips outlined in this article, you can confidently tie different loop knots to suit your needs and style. Remember, practice makes perfect, so keep on trying and experimenting until you find the perfect loop knot for you. Be sure to share your knot-tying tips and stories in the comments below, and check out our other resources for more fishing and outdoor advice and inspiration.


