I. Introduction
Tying a ribbon bow can be frustrating for many people. The loops end up uneven, and the knot never seems to look just right. The truth is, tying a ribbon bow is simple and can be done with ease. This article aims to provide readers with step-by-step instructions, techniques, tips, and tricks for tying beautiful ribbon bows, so you can add that finishing touch to your gift or project.
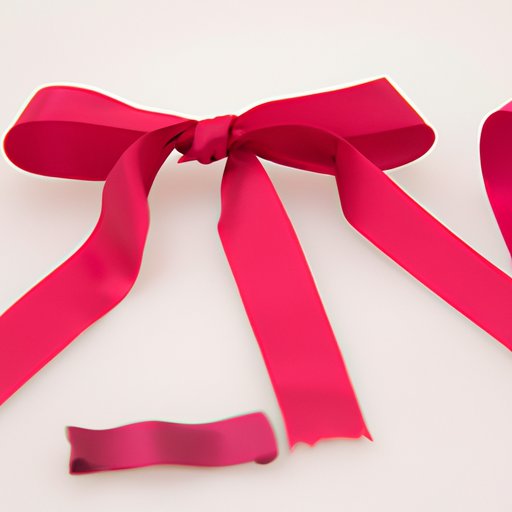
II. Step-by-Step Guide to Tying Perfect Ribbon Bows for All Occasions
To get started, you will need ribbon and a pair of scissors. Follow these five easy steps to tie a perfect ribbon bow:
Step 1: Making the loops
Make a loop with the ribbon, and keep it facing up. Repeat with the same length of ribbon, creating a mirror image.
Step 2: Cross the loops
Cross the left loop over the right loop, and pull the left loop behind the right.
Step 3: Tie the knot
Take the left loop and poke it through the hole, pulling it tight to form the knot.
Step 4: Adjusting the loops and tails
Adjust the loops and tails of the bow to your desired size, pulling them in opposite directions.
Step 5: Finishing touches
Trim the ends of the ribbon with scissors, and fluff up the bow.
III. 5 Different Techniques for Tying Ribbon Bows: Which One is Right for You?
There are various methods for tying ribbon bows, and each has its pros and cons. Here are five different techniques:
Technique 1: Basic loop method
This method is the most common. It creates a simple, classic bow that is perfect for any gift or project.
Technique 2: Flat bow method
This method uses a thinner ribbon with fewer loops, and results in a flat, more sophisticated bow.
Technique 3: Layered bow method
This method creates a multi-layered bow, perfect for adding depth and dimension to your gift or project.
Technique 4: Pom-pom bow method
This method uses a thicker, wired ribbon and creates a full, round, pom-pom-like bow that adds a whimsical touch.
Technique 5: Rosette bow method
This method creates a bow that resembles a rosette flower. It is perfect for adding a romantic touch to your gift or project.
IV. Master the Art of Bow-Tying: Tips and Tricks for a Beautiful Ribbon Bow
Here are some useful tips and tricks for tying a perfect ribbon bow:
Choosing the right ribbon
Consider the width, texture, and material of the ribbon. A wired ribbon works best, as it holds its shape.
Measuring the ribbon
Measure the ribbon according to the size of the finished bow you want. Cut more ribbon than you think you need so you can adjust the size later.
Securing the bow
Use a twist tie or a small piece of ribbon to secure the center knot as you adjust the loops and tails.
Using a fork or a template
Use a fork or a cardboard template to create even loops and tails. Simply wrap the ribbon around the fork or template, and tie the knot in the center.
Adding embellishments
Get creative and add beads, charms, or other embellishments to your ribbon bow to make it unique.
V. DIY: How to Tie a Ribbon Bow Like a Pro
If you prefer a visual guide, follow this video tutorial or step-by-step photos to tie a ribbon bow like a pro.
VI. Ways to Incorporate Ribbon Bows into Your Gift Wrapping: A Beginner’s Guide
Using ribbon bows to wrap gifts is a simple and elegant way to add a personal touch. Here are some tips for incorporating ribbon bows into your gift wrapping:
Choosing the right ribbon for the occasion
Consider the color and texture of the ribbon and match it to the theme or occasion. Use a shiny ribbon for a glamorous gift, and a matte ribbon for a rustic gift.
Using different sizes and colors
Mix and match different sizes and colors of ribbon to create a layered effect.
Adding other decorations
Get creative and add other decorations such as ornaments, flowers, or leaves to your ribbon bow.
Creating different bow styles
Experiment with different bow styles and techniques to create unique, customized gifts.
Tips for wrapping gifts with ribbon bows
Use double-sided tape to attach the ribbon to the gift, so it stays in place. Tie the bow on top of the gift, and fluff up the loops and tails.
VII. Conclusion
Tying a ribbon bow is a simple and satisfying skill that can add a personalized touch to any gift or project. With this guide, you have learned the step-by-step process, different techniques, tips and tricks, and ways to incorporate ribbon bows into your gift wrapping. Don’t be afraid to practice and experiment with different styles to create a unique and beautiful ribbon bow.


